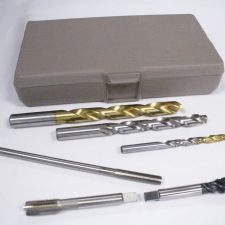
Transducer Mounting Hole Machining Tool Kit
The Dynisco Transducer Mounting Hole Machining Tool Kit contains all of the necessary drills and taps to prepare a standard 1/2 – 20 UNF transducer mounting hole and the 45 degree seat. All tools included in this kit are made of premium grade, high strength tool steel. Care should be taken in the use of proper speeds and feeds, lubricants, and a method to assure continual alignment of each progressing tool. M10 and M18 kits are also available.
- Suggested Procedure
Step 1: Drill a hole with the 9/32″ drill.
Step 2: Ream the hole with the 5/16″ reamer.
Step 3: Consult the mounting hole drawing and calculate the depth required for the .451/.458″ hole to leave .225″ minimum length of the 5/16″ (.312″) diameter hole. Using the special 29/64″ pilot drill, drill to the depth calculated above, perhaps leaving a little excess to be removed in step 7.
Step 4: Drill with the 17/32″ drill, if necessary, so as to leave approximately 1″ of the 29/64″ diameter hole length.
Step 5: Tap with the 1/2 – 20 plug tap (tap with tapered lean) as deep as possible without striking the chamfered seating surface that was produced by the pilot drill.
Step 6: Tap to the final depth with the 1/2 – 20
UNF bottoming tap.
Step 7: Examine the seating surface of the mounting hole. If it has been marked by the tapping operation, touch it up with
the pilot drill.

